Using Gentoo to build an embedded Raspberry pi OS
Introduction
Many moons ago now (2006) I wrote an article about using Gentoo's source based portage system to build embedded devices for the x86 world. This was very successful for me, and I made many of these OS versions for all kinds of appliances. I made use of all kinds of old hardware, including an old 486SX with 8MB of RAM with that guide. It even proved useful to build custom binaries for third party proprietary systems that ran a stripped down Linux under the hood.
However with the introduction of the Raspberry pi, suddenly the average user had access to a proper SBC for embedded projects (that needed more grunt than a microcontroller could provide). Ironically however, I ended up using full-fat operating systems on the Pi's because their boot cycle and architecture is different to x86, so my guide would no longer work.You can run Gentoo on the pi, but compiling the entire thing on the pi is an exercise in masochism. Me having multi-CPU computers with gobs of RAM sitting idle while I compile everything on a Raspberry pi just seemed nuts.
So after many years of using the full-fat OS'es for my projects, I decided to see how hard it would be to build a Linux based OS for the raspberry pi using the Gentoo system. Realistically most of my pi projects are appliances, for which a fully functional Linux OS is way overkill and takes away resources better utilised for my applications.
During my research, I found out two major events:
- uClibc seems to have been retired by Gentoo in 2021, so if we want a small libc, their official replacement is "musl".
- Other developers have put together a tool called "crossdev", which automates and simplifies most of the work needed for building cross compiled binaries
The second event has very much improved the situation with building cross compiled binaries, so I decided to write a new article to target building an embedded system for the Raspberry pi using crossdev.
Step 1: Build the development environment
First thing we need is a Gentoo environment from where we can build our binaries. If you are already running Gentoo then you are sorted :-). You can skip this step.
For the rest of us, there are multiple choices:
- Download a stage3 tarball and use chroot to enter this environment (this is how my old guide did it, and works for all Linux)
- Use a Gentoo docker container (an alternative way for Linux users)
- Install Gentoo in a VM (if you are not running Linux or another compatible Unix)
Unless otherwise mentioned, the commands listed below are to be run as root. Whichever method you use to get your environment running, once you are done follow the instructions below under "Applies to all".
N.B: I have omitted a section for "VM install" because:
- It is dependent on the hypervisor you use (and there are many), and
- The rest of the process is the same as installing Gentoo on any other system, at which point the Gentoo Handbook is your best source for up to date instructions.
Chroot method (Linux)
N.B: This has been tested on my OS, Devuan Chimaera (Debian systemd-free fork), but should work on all Linux distros. You need to do this as root, as chroot and bind mounting are root operations.
If you go with this method, you need to get yourself a copy of the Gentoo stage 3 tarball for your host architecture (i.e. if you are building on an AMD64 based system, you get the "amd64" arch) and unpack it into a directory (I call it "embEnv", but you can call it anything). As I am on AMD64 I get my stage3 from this Gentoo autobuild here (browse around for your own arch in the folder tree), after which you have to bind the /proc and /dev mounts into your chrooted environment, as well as copy the resolv.conf so you can resolve DNS.
mkdir ./embEnv
# Note your date suffix will probably differ
tar -Jxvpf ./stage3-amd64-openrc-20231217T170203Z.tar.xz -C ./embEnv
cd ./embEnv
mount -t proc none ./proc
mount --bind /dev/ ./dev
cp /etc/resolv.conf ./etc/
Once the above is set up, the next step is to chroot into your environment, then emerge --sync to build your portage tree in the chroot environment.
chroot ./
source /etc/profile
Docker method (Linux)
There seems to be auto-built Gentoo images available here, which are pushed to dockerhub. They provide a collection of images including the musl builds, so we can just use that. As the images are in dockerhub to build our container we just issue a run command with the target as follows:
# The "-ti" gives us an interactive shell in the current terminal,
# with /tmp mapping to workstation for data transfer
% docker run -v /tmp:/tmp -ti gentoo/stage3:amd64-openrc
d83126178b52 / # pwd
/
d83126178b52 / #
Likewise I tested this on my Devuan box. Indeed I preferred this method as it isolates the build from the rest of my system better, so it is the one I will use for the rest of this article.
Either way, that is it! The environment is now ready. It is even simpler to start than the chroot method.
Applies to all
No matter the method you used to get your environment working, the below needs to be done next within the environment you just built.
First we set our locale, we do this by editing "/etc/locale.gen" and inputting your chosen locale (I used "en_GB.UTF-8 UTF-8"), after which you run "locale-gen" to generate our locales
Then we have to sync our Gentoo tree:
emerge --sync
env-update
if that went well you should have no errors after the "emerge --sync" command. Sometimes however you will get requests for updates like so:
Action: sync for repo: gentoo, returned code = 0

* An update to portage is available. It is _highly_ recommended
* that you update portage now, before any other packages are updated.

* To update portage, run 'emerge --oneshot sys-apps/portage' now.
This usually means the build you extracted is slightly out of date from the latest portage tree, so you should update portage as it asks, after which a world update would be good to make sure all our packages are fully up to date. This is also a good test to make sure your build environment is working properly.
emerge --oneshot sys-apps/portage
emerge -avuD system
emerge -avuD world
And we are done, on to step 2!
Step two: Setting up for cross compilation
Unlike our x86 embedded article, we have to compile for a target that is a different architecture from us. This is usually called "cross compiling" and it it is a bit more complicated to configure. Still it is not insurmountable, and Gentoo has helpfully provided us with a tool called "crossdev" to make this easier for us.
The SBC world is rife with minor changes and quirks between revisions, and the pi is no exception. The full number of generations and their differences can be found here, but at this point in time we are interested in architectural generations, of which there are thankfully fewer:
- ARMv6: All single core. Used in:
- A 700MHz version (ARM11 ARM1176JZF-S) in all first generation Raspberry pi's
- A 1000MHz version (ARM11 Low Power) in the Raspberry pi Zero
- ARMv7-A: All quad-core. Used in:
- A 900 MHz version (ARM Cortex-A7) used in all Generation 2 pi's prior to board revision 1.2
- ARMv8-A: All quad-core. Used in:
- A 900 MHz version (ARM Cortex-A53, under-clocked) used in all Generation 2 pi after board revision v1.2)
- A 1200 MHz version (ARM Cortex-A53) used in all Generation 3 pi's
- A 1400 MHz version (ARM Cortex-A72) used in the Raspberry pi 4)
The Cortex-A53 and A72 follow AArch64, while the ARM11 and A7 use the "legacy" 32 bit ARM32 architecture.
The above is accurate to my knowledge (as of September 2019), but Wikipedia should provide an up-to-date model comparison that will be updated in future. The good news is that at the moment we only have to deal with 2 architectures to cover all the major pi's available. Bad news is that the raspberry pi 2 has a core switch within its generation, so you have to see if you have a v1.2 revision board or earlier to know which instruction set to target.
For this article, I will target the original ARM32 architecture (ARMv6 instruction set), simply because I have a drawer of generation 1 pi's currently unused, so I don't have to take one of my newer pi's off production duty for this write up. As such, we will target ARMv6 for this article.
So first we need to emerge crossdev, then configure crossdev so it doesn't pollute our development environment. The latest information for this is found in the Gentoo wiki page itself, but for now the following commands work:
First we emerge crossdev, along with git (as we will need it later on)
emerge -av sys-devel/crossdev dev-vcs/git
Then we create the crossdev tree and configure the repo_name and layout
mkdir -p /var/db/repos/crossdev/{profiles,metadata}
echo 'crossdev' > /var/db/repos/crossdev/profiles/repo_name
echo 'masters = gentoo' > /var/db/repos/crossdev/metadata/layout.conf
chown -R portage:portage /var/db/repos/crossdev
Then we create a portage config file "/etc/portage/repos.conf/crossdev.conf" to enable our crossdev repo with the followig configuration:
[crossdev]
location = /var/db/repos/crossdev
priority = 10
masters = gentoo
auto-sync = no
With that done, we source the above file and start our crossdev environment compilation for our target pi. The targets available for the pi's are as follows, so use the target that suits the pi you are targeting for:
- armv6j-hardfloat-linux-gnueabi (All ARMv6)
- armv7a-unknown-linux-gnueabihf (All ARMv7-A)
- aarch64-unknown-linux-gnu (All ARMv8-A)
crossdev --target armv6j-hardfloat-linux-gnueabi
Once built, crossdev should have created the following files for you:
/usr/armv6j-hardfloat-linux-gnueabi/etc/portage/make.conf
/usr/armv6j-hardfloat-linux-gnueabi/etc/portage/profile/make.defaults
/usr/armv6j-hardfloat-linux-gnueabi/etc/portage/profile/use.force
This should be familiar to you from a general Gentoo installation. In our case we are interested in editing the make.conf to suit the specific needs of the embedded system we are building. You can find a full list of GCC options for ARM here. The "-mcpu" option is deprecated so we use "-march" instead. This is where we will put our use flags as well (the USE flags that are specific to our target system). In my case I added the following lines to my make.conf:
# The ARM11 core used in the pi has a FPU, so we enable FPU support
CFLAGS="-march=armv6zk -mtune=arm1176jzf-s  -mfpu=vfp -mfloat-abi=hard"
MAKEOPTS="-j6" # Number of parallel builds to run, I set this to the number of cores on my workstation
PYTHON_TARGETS="python_3_10" # This is required to build portage, which is a dependency for some packages
USE="${ARCH} -crypt -pam make-symlinks"
WARNING: Do NOT set any other custom USE flags at this point. Based on my experience when we are bootstrapping the system custom USE flags can cause dependency resolution issues (especially circular dependencies when building libC). We will add our custom USE flags to the make.conf later.
If your make.conf already definitions for the above variable, then append the values rather than replace. Once this is done the next step is to set up your environment variables to build from this profile, and start building the base system:
ARCH=arm
PORTAGE_CONFIGROOT=/usr/armv6j-hardfloat-linux-gnueabi
With the environment variables set, you can list what profiles you have using "eselect profile list". In my case I get the following:
#% eselect profile list
Available profile symlink targets:
  [1]   default/linux/amd64/17.1 (stable) *
  [2]   default/linux/amd64/17.1/selinux (stable)
  [3]   default/linux/amd64/17.1/hardened (stable)
  [4]   default/linux/amd64/17.1/hardened/selinux (stable)
  [5]   default/linux/amd64/17.1/desktop (stable)
  [6]   default/linux/amd64/17.1/desktop/gnome (stable)
  [7]   default/linux/amd64/17.1/desktop/gnome/systemd (stable)
  [8]   default/linux/amd64/17.1/desktop/gnome/systemd/merged-usr (stable)
  [9]   default/linux/amd64/17.1/desktop/plasma (stable)
  [10]  default/linux/amd64/17.1/desktop/plasma/systemd (stable)
  [11]  default/linux/amd64/17.1/desktop/plasma/systemd/merged-usr (stable)
  [12]  default/linux/amd64/17.1/desktop/systemd (stable)
  [13]  default/linux/amd64/17.1/desktop/systemd/merged-usr (stable)
  [14]  default/linux/amd64/17.1/developer (exp)
  [15]  default/linux/amd64/17.1/no-multilib (stable)
  [16]  default/linux/amd64/17.1/no-multilib/hardened (stable)
  [17]  default/linux/amd64/17.1/no-multilib/hardened/selinux (stable)
  [18]  default/linux/amd64/17.1/no-multilib/systemd (dev)
  [19]  default/linux/amd64/17.1/no-multilib/systemd/merged-usr (dev)
  [20]  default/linux/amd64/17.1/no-multilib/systemd/selinux (exp)
  [21]  default/linux/amd64/17.1/no-multilib/systemd/selinux/merged-usr (exp)
  [22]  default/linux/amd64/17.1/systemd (stable)
  [23]  default/linux/amd64/17.1/systemd/merged-usr (stable)
  [24]  default/linux/amd64/17.1/systemd/selinux (exp)
  [25]  default/linux/amd64/17.1/systemd/selinux/merged-usr (exp)
  [26]  default/linux/amd64/17.1/clang (exp)
  [27]  default/linux/amd64/17.1/systemd/clang (exp)
  [28]  default/linux/amd64/17.1/systemd/clang/merged-usr (exp)
  [29]  default/linux/amd64/17.0/x32 (dev)
  [30]  default/linux/amd64/17.0/x32/systemd (exp)
  [31]  default/linux/amd64/17.0/x32/systemd/merged-usr (exp)
  [32]  default/linux/amd64/17.0/musl (dev)
  [33]  default/linux/amd64/17.0/musl/clang (exp)
  [34]  default/linux/amd64/17.0/musl/hardened (exp)
  [35]  default/linux/amd64/17.0/musl/hardened/selinux (exp)
There is quite a variety here, each tweaked to different base use cases. The default is "default/linux/amd64/17.1" is probably the best generic case. However as we are building for the first generation pi that only has 256MB, I would have liked to build a "musl" based system, the smaller libc contributing to keeping OS RAM usage down. To do this we would have to select the profile number 32. Unfortunately I found that the musl profile does not yet work properly, so I will be selecting the profile "1" for the full fat glibc which is marked stable:
eselect profile set 1  # 1 is the number on the list, but you can set by full string if you prefer
env-update
Now we are ready to build our base system!
Building the base system
If the above stage went smoothly, then you should have a set of target specific commands in you shell. For example as I am targeting the ARMv6 of the original pi, I have:
# armv6j-hardfloat-linux-gnueabi-
armv6j-hardfloat-linux-gnueabi-addr2line    armv6j-hardfloat-linux-gnueabi-gcc-nm
armv6j-hardfloat-linux-gnueabi-ar           armv6j-hardfloat-linux-gnueabi-gcc-ranlib
armv6j-hardfloat-linux-gnueabi-as           armv6j-hardfloat-linux-gnueabi-gfortran
armv6j-hardfloat-linux-gnueabi-c++          armv6j-hardfloat-linux-gnueabi-gfortran-13
armv6j-hardfloat-linux-gnueabi-c++-13       armv6j-hardfloat-linux-gnueabi-gprof
armv6j-hardfloat-linux-gnueabi-c++filt      armv6j-hardfloat-linux-gnueabi-ld
armv6j-hardfloat-linux-gnueabi-cc           armv6j-hardfloat-linux-gnueabi-ld.bfd
armv6j-hardfloat-linux-gnueabi-cpp          armv6j-hardfloat-linux-gnueabi-lto-dump
armv6j-hardfloat-linux-gnueabi-cpp-13       armv6j-hardfloat-linux-gnueabi-nm
armv6j-hardfloat-linux-gnueabi-ebuild       armv6j-hardfloat-linux-gnueabi-objcopy
armv6j-hardfloat-linux-gnueabi-elfedit      armv6j-hardfloat-linux-gnueabi-objdump
armv6j-hardfloat-linux-gnueabi-emerge       armv6j-hardfloat-linux-gnueabi-pkg-config
armv6j-hardfloat-linux-gnueabi-fix-root     armv6j-hardfloat-linux-gnueabi-ranlib
armv6j-hardfloat-linux-gnueabi-g++          armv6j-hardfloat-linux-gnueabi-readelf
armv6j-hardfloat-linux-gnueabi-g++-13       armv6j-hardfloat-linux-gnueabi-size
armv6j-hardfloat-linux-gnueabi-gcc          armv6j-hardfloat-linux-gnueabi-strings
armv6j-hardfloat-linux-gnueabi-gcc-13       armv6j-hardfloat-linux-gnueabi-strip
armv6j-hardfloat-linux-gnueabi-gcc-ar
Building the userland
Our main command will be "armv6j-hardfloat-linux-gnueabi-emerge", which we will use to build our system. We start by building out the base system. To do this we are going to set a custom "ROOT" variable before we emerge. the ROOT variable will tell emerge where to install the package binaries we just built. As this will be part of the embedded system image I am going to put it in its own custom directory in /tmp, called "/pi_rootfs".
ROOT=/tmp/pi_rootfs armv6j-hardfloat-linux-gnueabi-emerge -av sys-apps/baselayout
"sys-apps/baselayout" does what it says on the tin, it creates the standard Linux directory tree under your root fs, as so:
# ls /tmp/pi_rootfs/
etc  lib  run  tmp  usr  var
Now we can start emerging the basics we need for an OS to run. That includes a shell, a libc library and ancillaries. In my case I emerged "busybox" which includes the shell and ancillary utilities in one package/binary to reduce OS resource requirements. I would have liked to use "musl" but trying to emerge musl and busybox pulls in glibc, which seems like a bug in the profile. So for now we stick with the better supported glibc:
# Do not set custom USE flags for the below, they break easily on initial build
ROOT=/tmp/pi_rootfs armv6j-hardfloat-linux-gnueabi-emerge -av sys-libs/glibc sys-apps/busybox
The above will take a while, because those two packages will pull in the dependencies needed to build a complete basic system.
If the base system built correctly, we can now add custom USE flags to our make.conf, for this example I added "perl" to my USE flags in make.conf, then ran the following:
ROOT=/tmp/pi_rootfs armv6j-hardfloat-linux-gnueabi-emerge -avu --newuse @system
It does seem silly to have to build once, then add USE flags and then rebuild, but in my experience this method causes fewer issues with circular dependencies. However when done you will have a complete base system ready.
Final touches
With the above done, we are left with the final configuration of the userland. We need to configure:
- /etc/hostname, so our machine has a human readable name
- /etc/fstab so the root partition is correctly mounted
- /etc/passwd, so we have correctly set users and passwords for access
- Our init system, so that the system behaves as we wish upon booting
For /etc/hostname, we just create it as so (feel free to use any name you want):
echo "Embedded_Gentoo" > /tmp/pi_rootfs/etc/hostname
For /etc/fstab, we need to set our root partition. If you set a swap partition include it here as well. When done your fstab should look a bit like this:
% cat /tmp/pi_rootfs/etc/fstab

# Not required, but some apps rely on them being mounted
#none			/proc	proc	defaults	0	0
#none			/sys	sysfs	defaults	0	0

/dev/mmcblk0p2	/		ext4	defaults	1	2
#LABEL=swap		none	swap	sw		0	0
"/proc" and "/sys" are not actually required for Linux to work, they are conveniences for users and certain applications. They are commented out above, but if your use case depends on them, uncomment the above and make sure the "/proc" and "/sys" folders are created on your "/tmp/pi_rootfs".
For /etc/passwd, you can use openSSL to generate your root password.
% openssl passwd -1
Password:
Verifying - Password:
$1$COGh7HVl$ITD95K4yrmWKYEdu7qx0.1
mkdir /tmp/pi_rootfs/root # Don't forget to create home directories for each user you create
This is then inserted in /tmp/pi_rootfs/etc/passwd for the root user. Being an embedded system we don't need many users (in theory we could get away with just the root user line) and we don't need a separate shadow file as this is not a multi-user general system. We just keep the passwords in /etc/passwd.
root:$1$cUz1eIqR$MYQCc5JW2iCIxpFqowGOf/:0:0:root:/root:/bin/sh
bin:x:1:1:bin:/bin:/bin/false
daemon:x:2:2:daemon:/sbin:/bin/false
sync:x:5:0:sync:/sbin:/bin/sync
halt:x:7:0:halt:/sbin:/sbin/halt
For the init system, we use the simple /sbin/init that comes by default in the baselayout image. For this to work, we need to create the /etc/inittab file, which tells init what to do at which runlevel. So we create the /etc/inittab file, my one looks like this:
# Our Terminal, being an embedded system we can choose how many TTYs we want (I went with two)
tty1:2345:respawn:/sbin/getty 38400 tty1
tty2:2345:respawn:/sbin/getty 38400 tty2

# What to do at the "Three Finger Salute". Tradition dictates we reboot
# but of course you can make it do anything you want here
::ctrlaltdel:/sbin/reboot

#Spawn a getty on Raspberry Pi serial line
#::respawn:/sbin/getty -L ttyAMA0 115200 vt102


# System initialisation happens here. Rather than a full fat system here, we just
# execute our custom init script (/etc/rc.local)
::sysinit:/etc/rc.local
Once the above is set up, you have to make sure that the "/dev" folder exists (so it can mount it) so do
mkdir /tmp/pi_root/dev
Now we need to write our init script. This can be in shell, or any other interpreted language installed. For example, if you installed Perl your rc.local could be written in Perl. However in this system we only have the bare bones, so /bin/sh it is! We need to set up the following on our system:
- re-mount the root file system read-write
- Set the hostname of the machine to whatever is in /etc/hostname
- Configure ancillaries if we want them (e.g. networking)
So my /etc/rc.local looks like this:
echo "exec /etc/rc.local" > /dev/kmsg
hostname -F /etc/hostname
mount -a  # mount all auto-marked filesystems in fstab
#ifconfig lo 127.0.0.1  # Uncomment this if you intend to use localhost networking
N.B: Make sure your /etc/rc.local is set executable! Otherwise it won't be launched by init (a "chmod u+x" should suffice). Anything you write to /dev/kmsg will appear in the kernel logs. This way we don't need a separate logging system, you can view the kernel logs with "dmesg" just fine.
As an example, plus to have something to confirm our system has successfully booted and we can log in, we will create a motd. I put a homage to this article in there :-)
  _____         __              ____      __          __   __       __
 / ___/__ ___  / /____  ___    / __/_ _  / /  ___ ___/ /__/ /__ ___/ /
/ (_ / -_) _ \/ __/ _ \/ _ \  / _//  ' \/ _ \/ -_) _  / _  / -_) _  /
\___/\__/_//_/\__/\___/\___/ /___/_/_/_/_.__/\__/\_,_/\_,_/\__/\_,_/

------------------------------------------------------------------------------
Gento Embedded: Raspberry Pi Gen 1 edition         http://www.ziva-vatra.com
With that the userland should be ready for use, the only missing ingredient is the kernel. For that, read on!
(optional) Building the kernel
Now we need a kernel. We can use the pre-built one bundled with the firmware (see the firmware stage below) or we can build our own kernel as described here.
If you wish to build your own kernel from source the raspberry pi offers their specific kernel in their own Github repo here. We are going to build from these sources as they are the official ones, so they should have the least headache to get running.
cd /usr/armv6j-hardfloat-linux-gnueabi/usr/src/
git clone --depth=1 https://github.com/raspberrypi/linux ./linux-pi
Once the sources are ready, we have to set our environment to cross compile (as we are not using crossdev here), so we do the following:
% cd /usr/armv6j-hardfloat-linux-gnueabi/usr/src/linux-pi
export ARCH=arm
export KERNEL=kernel
export CROSS_COMPILE=armv6j-hardfloat-linux-gnueabi-
make bcmrpi_defconfig # Create default config for this specific pi
The "make bcmrpi_defconfig" is specific to the pi1, each pi has a different default kernel config. The full list of what is available can be found here. Once the default config is done, you can do "make menuconfig" (or equivalent) if you want to make changes.
Once you are happy with your config, type "make zImage", this will build us a compressed kernel binary. If you enabled modules, then you need to do "make zImage modules" so that it builds those too. We do not do a "make install" because the Raspberry pi's boot structure results in the kernel being stored on a separate filesystem to the linux system (see below "boot configuration" stage. When complete you should get a response similar to this:
  CALL    scripts/checksyscalls.sh
  Kernel: arch/arm/boot/Image is ready
  Kernel: arch/arm/boot/zImage is ready
If you did include module support in your configuration, we can install those modules into our rootfs at this point in time. To do that, we run:
INSTALL_MOD_PATH="/tmp/pi_rootfs/" make modules_install
Getting the firmware (and pre-built kernel)
The pi like most SBCs has its own specific design and boot process, which usually requires custom firmware. More often than not this firmware is proprietery to the company that makes the SoC (System on Chip, which is a bundle of the CPU, GPU and I/O). The pi is no different in this regard (and will remain so until someone makes a fully open HW/open source board). We can get the firmware from github as well:
git clone --depth 1 https://github.com/raspberrypi/firmware
The pi uses a Broadcom SoC, and their licence is in "boot/LICENCE.broadcom". As we are building this for a pi and are doing anything with the firmware except booting Linux (like every other pi distro out there) we should be fine to carry on.
Now we have the pi firmware. It provides a default built kernel and modules in the repository above, so if you did not build your own custom kernel in the above steps, you can use the ones bundled here.
Boot configuration
So we have our userland, kernel and our firmware, now we need to make a bootable image. The Raspberry pi uses a SD card, with a minimum of two partitions, the boot partition which is FAT and the root partition which is ext4. Some people create a third "Linux swap" partition, but running swap on a SD card will kill it quickly (plus the low IOPS will lock up your system or at least render it barely usable), so I don't bother.
First we have to prepare our SD card so that we have the two partitions. You should aim to have about 128MB of FAT partition so you have space for the kernels, firmware, bootloader and extra space for future options. Here is my output of fdisk after the partitions were configured on an 8GB SD card:
# fdisk -l  /dev/sdk
Disk model: USB  SD Reader
Units: sectors of 1 * 512 = 512 bytes
Sector size (logical/physical): 512 bytes / 512 bytes
I/O size (minimum/optimal): 512 bytes / 512 bytes
Disklabel type: dos
Disk identifier: 0x00000000

Device     Boot  Start      End  Sectors  Size Id Type
/dev/sdk1  *      2048   264191   262144  128M  b W95 FAT32
/dev/sdk2       264192 15564799 15300608  7.3G 83 Linux
Note that the bootable flag is set on the FAT32 partition, you need to make sure it is set as the boot firmware checks this flag to make sure the partition it has found is bootable.
Now we format the partitions and mount them somewhere convenient:
mkfs.vfat /dev/sdk1
mkfs.ext4 /dev/sdk2
mkdir /tmp/pi/boot
mkdir /tmp/pi/root
mount /dev/sdk1 /tmp/pi/boot
mount /dev/sdk2 /tmp/pi/root
Firmware and Kernel
The first thing we do is copy the firmware/boot folder to our /tmp/pi/boot
cp -R firmware/boot/* /tmp/pi/boot/
While doing this we will end up copying all the firmwares needed for all the current pi's. The bootcode itself will pick the right kernel and overlay for our pi, our job is to make sure it is the correct kernel.
If you did not build your own custom kernel then you don't have to do anything here. For those of us who did, you need to replace the kernel in the boot folder with your custom one. There are multiple kernels in the firmware, as shown here:
% ls boot/*.img
# Original Pi 1, Zero and Zero W, and Raspberry Pi
# Compute Module 1 (32-bit)
kernel.img

# Raspberry Pi 2, 3, 3+ and Zero 2 W, and Raspberry Pi
# Compute Modules 3 and 3+ (32-bit)
kernel7.img

# For Raspberry Pi 4 and 400, and Raspberry Pi
# Compute Module 4 (32-bit)
kernel7l.img

# For Raspberry Pi 3, 3+, 4, 400 and Zero 2 W, and Raspberry Pi
# Compute Modules 3, 3+ and 4 (64-bit)
kernel8.img
Again, each kernel corresponds to a pi version, I've commented above which one is for which. As we are building for the first generation pi, we need to replace kernel.img with our custom kernel:
cp /usr/armv6j-hardfloat-linux-gnueabi/usr/src/linux-pi/arch/arm/boot/zImage /tmp/pi/boot/kernel.img
Please remember to copy your modules across as mentioned earlier in the article (if you compiled your kernel with module support).
Userland
Now we copy our userland to the rootfs, there are multiple ways of doing this. If you can't mount your SD card somewhere that has access to the pi_rootfs, then you can use tar to bundle it up and move it across for extraction. I can use rsync, but I include the tar command below because I like to keep a copy as a backup that way:
tar -jcpvf ~/pi_rootfs.tar.bz2 /tmp/pi_rootfs
rsync --delete-before -avl /tmp/pi_rootfs/  /tmp/pi/root/
At this point I like to clear out some of the cruft that is installed by default but not needed for an embedded system, specifically:
# We will not be building and installing packages on the system directly, so we can
# remove portage, and includes/header files
rm -rf /tmp/pi/root/var/lib/portage
rm -rf /tmp/pi/root/usr/include/
Final touches
With the above done, we are left with the final configuration. We need to configure:
- config.txt so the pi comes up with the configuration we want
- cmdline.txt so the kernel is booted with the configuration we want
Our config.txt defines what parts of the pi to enable. For full details of what is possible (for each pi), it is best to consult the upstream documentation. For the moment I am just setting the following:
# Force the monitor to HDMI mode so that sound will be sent over HDMI cable
hdmi_drive=2
# Set monitor mode to DMT
hdmi_group=2
# Set monitor resolution to 1024x768 XGA 60Hz (HDMI_DMT_XGA_60)
hdmi_mode=16
# Make display smaller to stop text spilling off the screen
overscan_left=20
overscan_right=12
overscan_top=10
overscan_bottom=10
# Set GPU memory to our requirements for this application
# from 16MB to 50% of total pi RAM
gpu_mem=16
For our cmdline.txt, we want to give the kernel parameters needed to boot, including for our root partition so it knows what the root partition is before it can read fstab (logically, as the fstab is on the root parition) as read-write (rw):
echo "root=/dev/mmcblk0p2 rootfstype=ext4 init=/sbin/init console=tty1 rootwait rw" > /tmp/pi/boot/cmdline.txt
And that is it! We are ready to boot
Booting
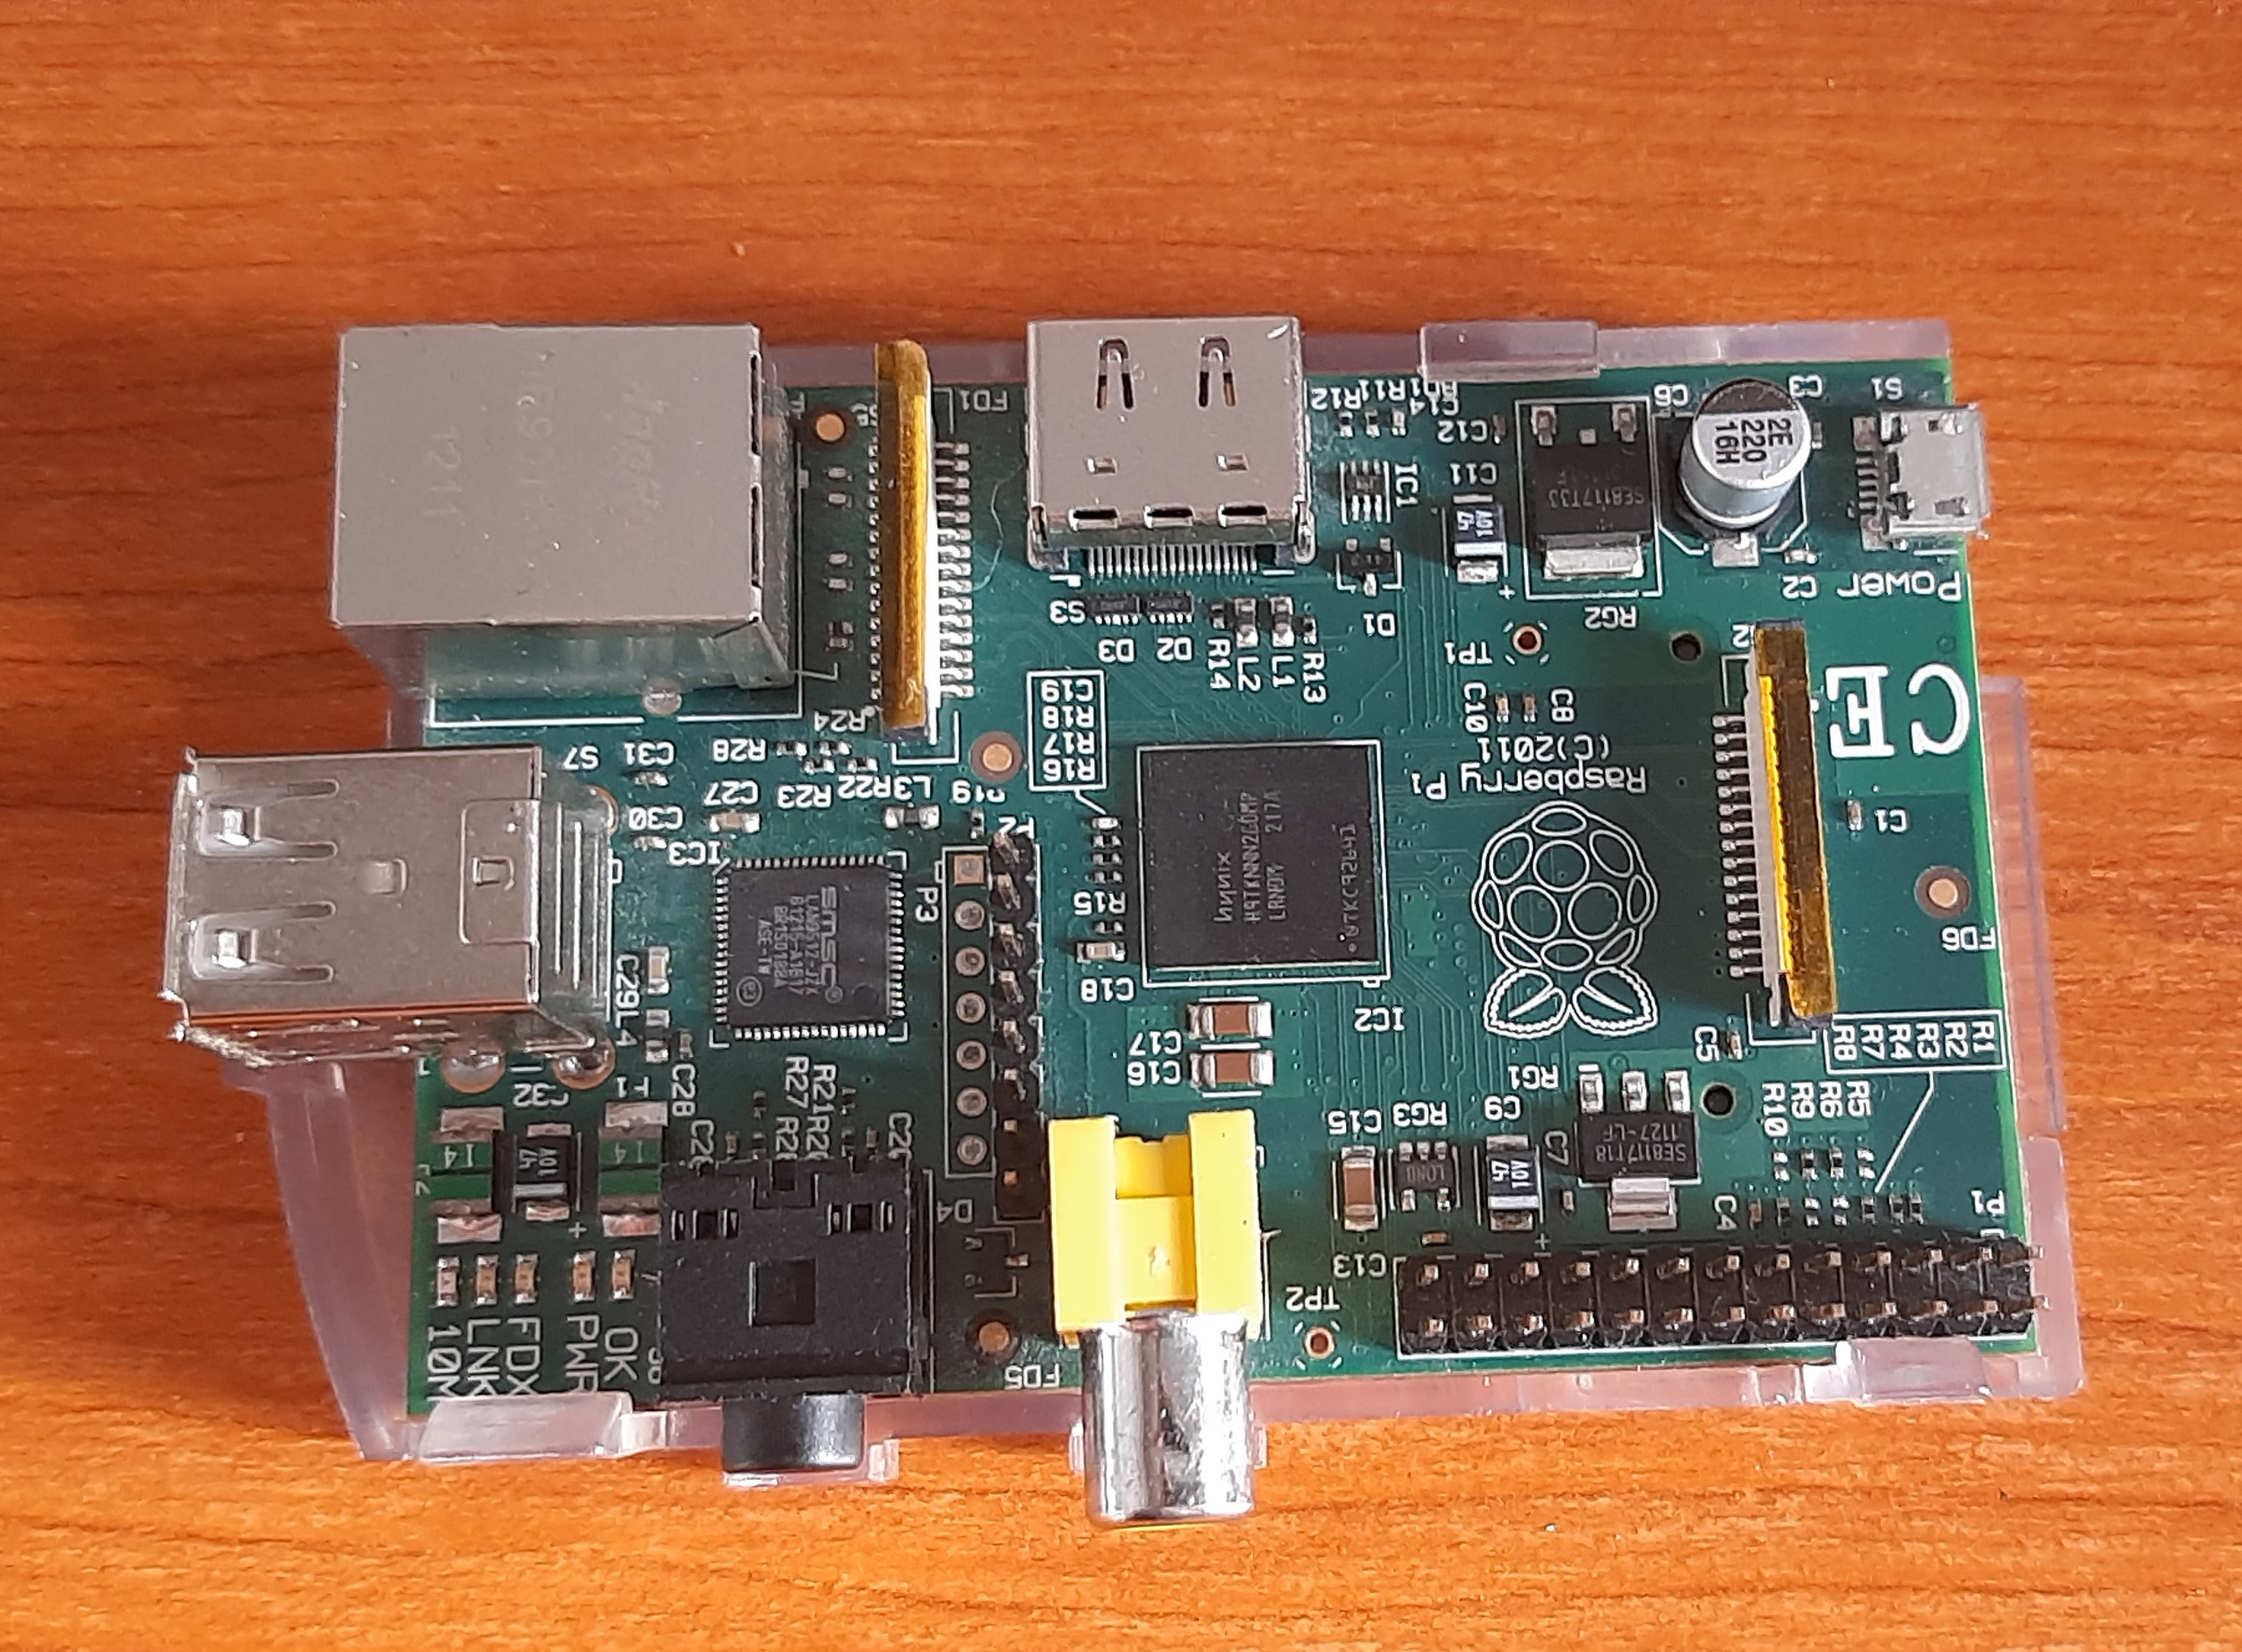
For testing I am using my old raspberry pi 1, in fact a pre-order prototype version (I was very keen on the idea of a SBC available for the masses, so this to date is my first and only pre-order item) as can be noted by the fact there are no mounting holes on it, more test points and factory soldered headers (unlike the production models):
Unmount your SD card and stick in the pi and turn it on. With any luck it should boot automatically. When booting is done you should see the login prompt:
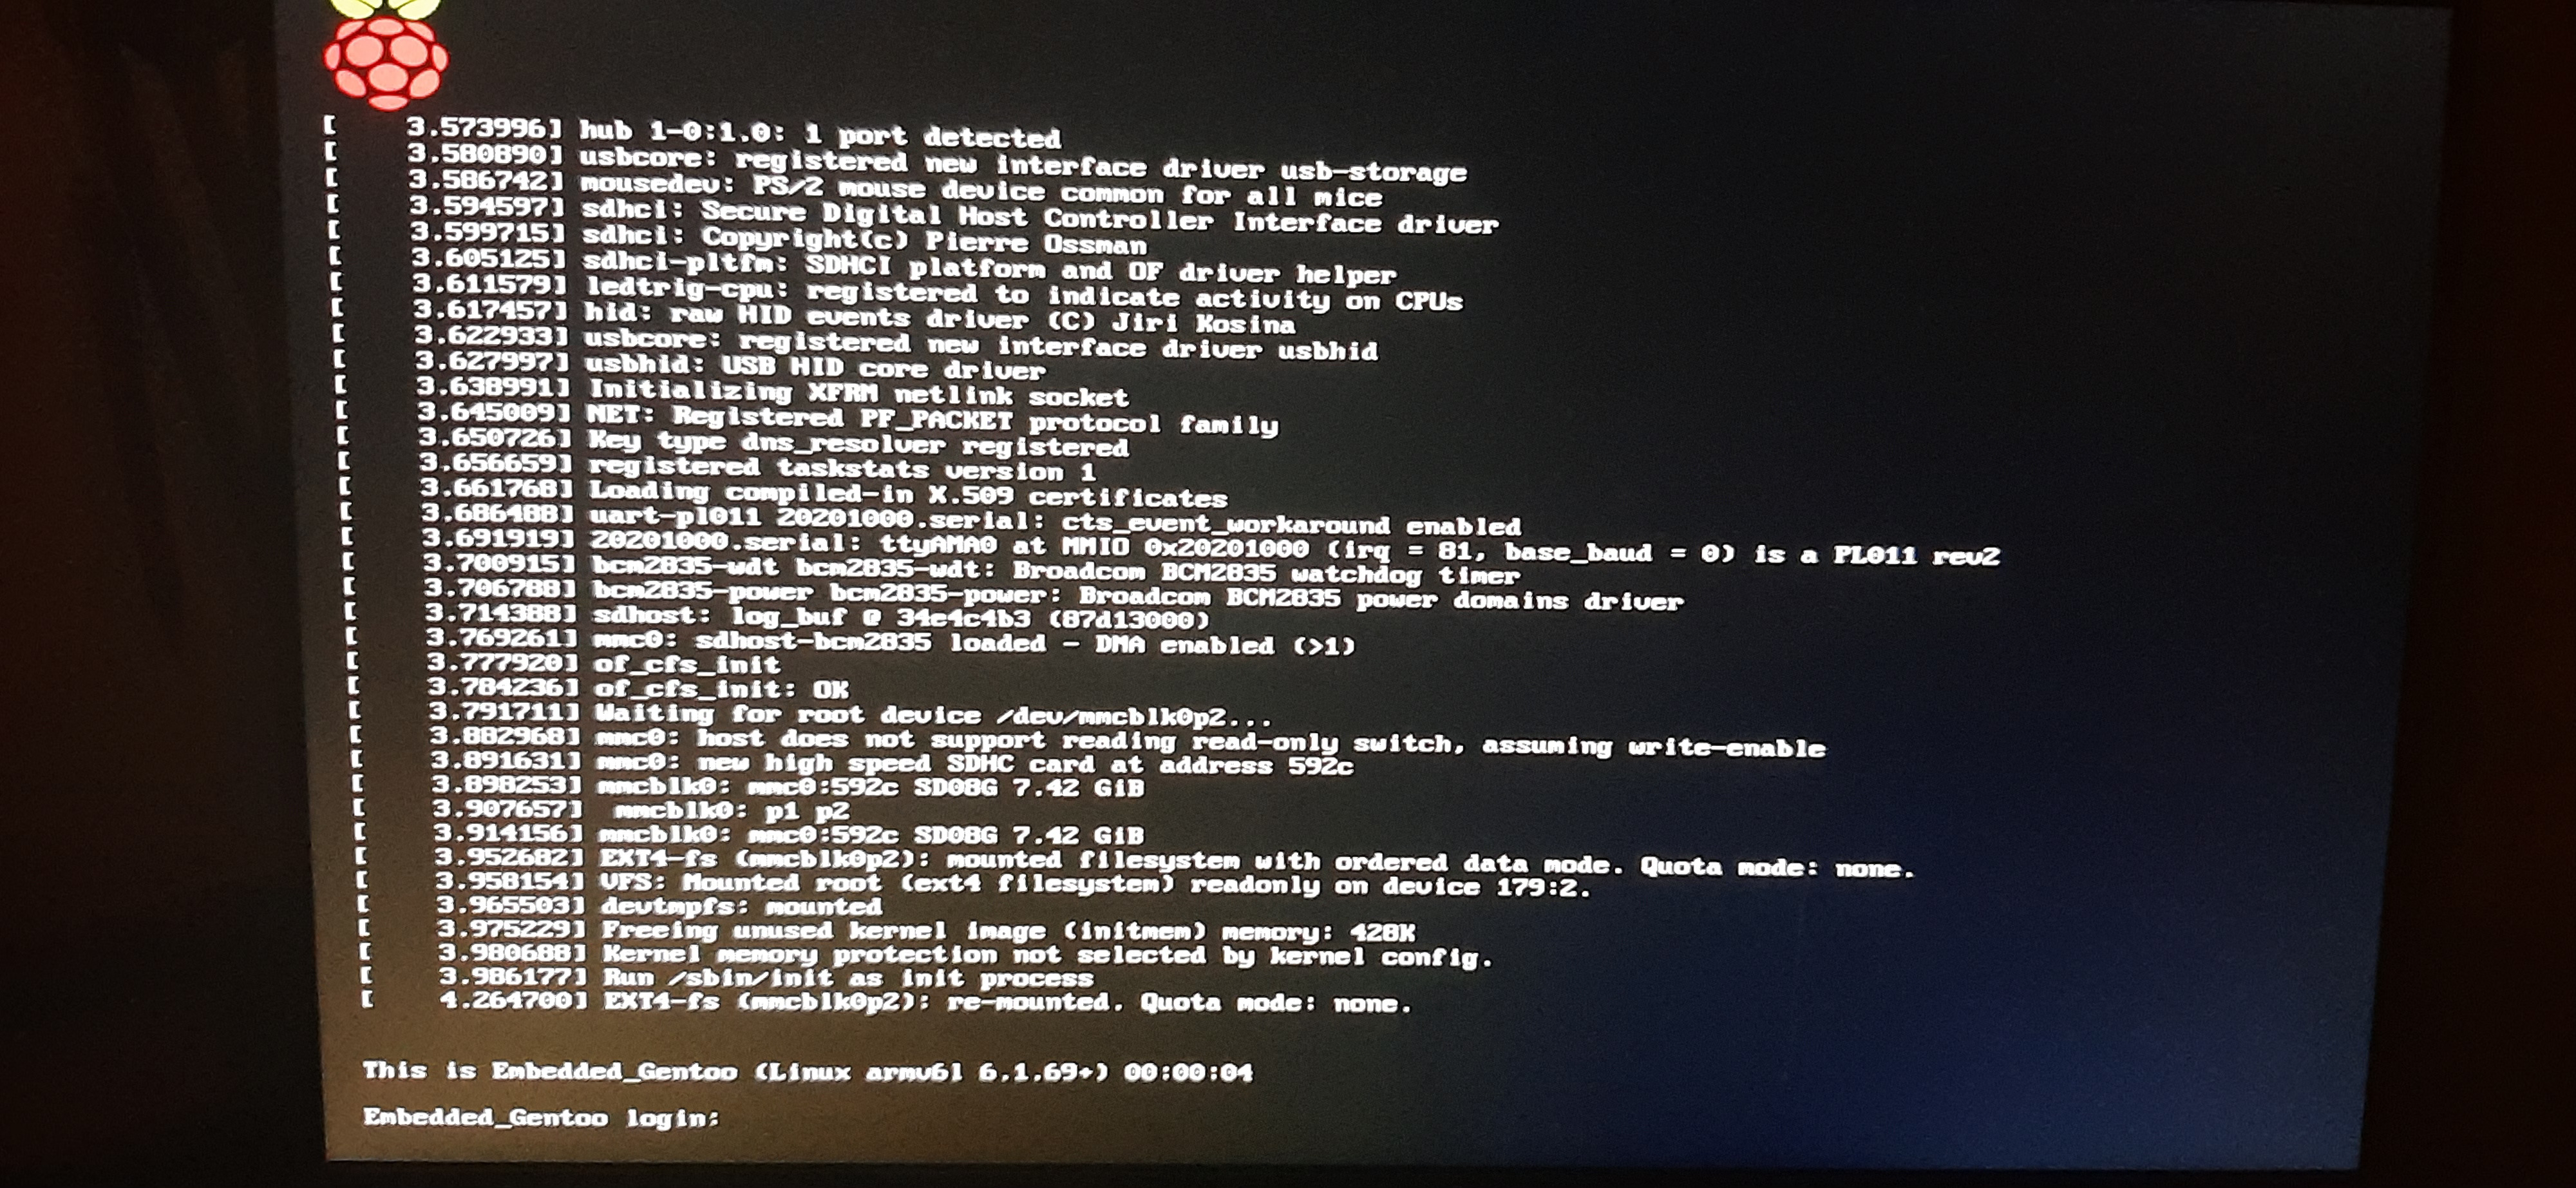
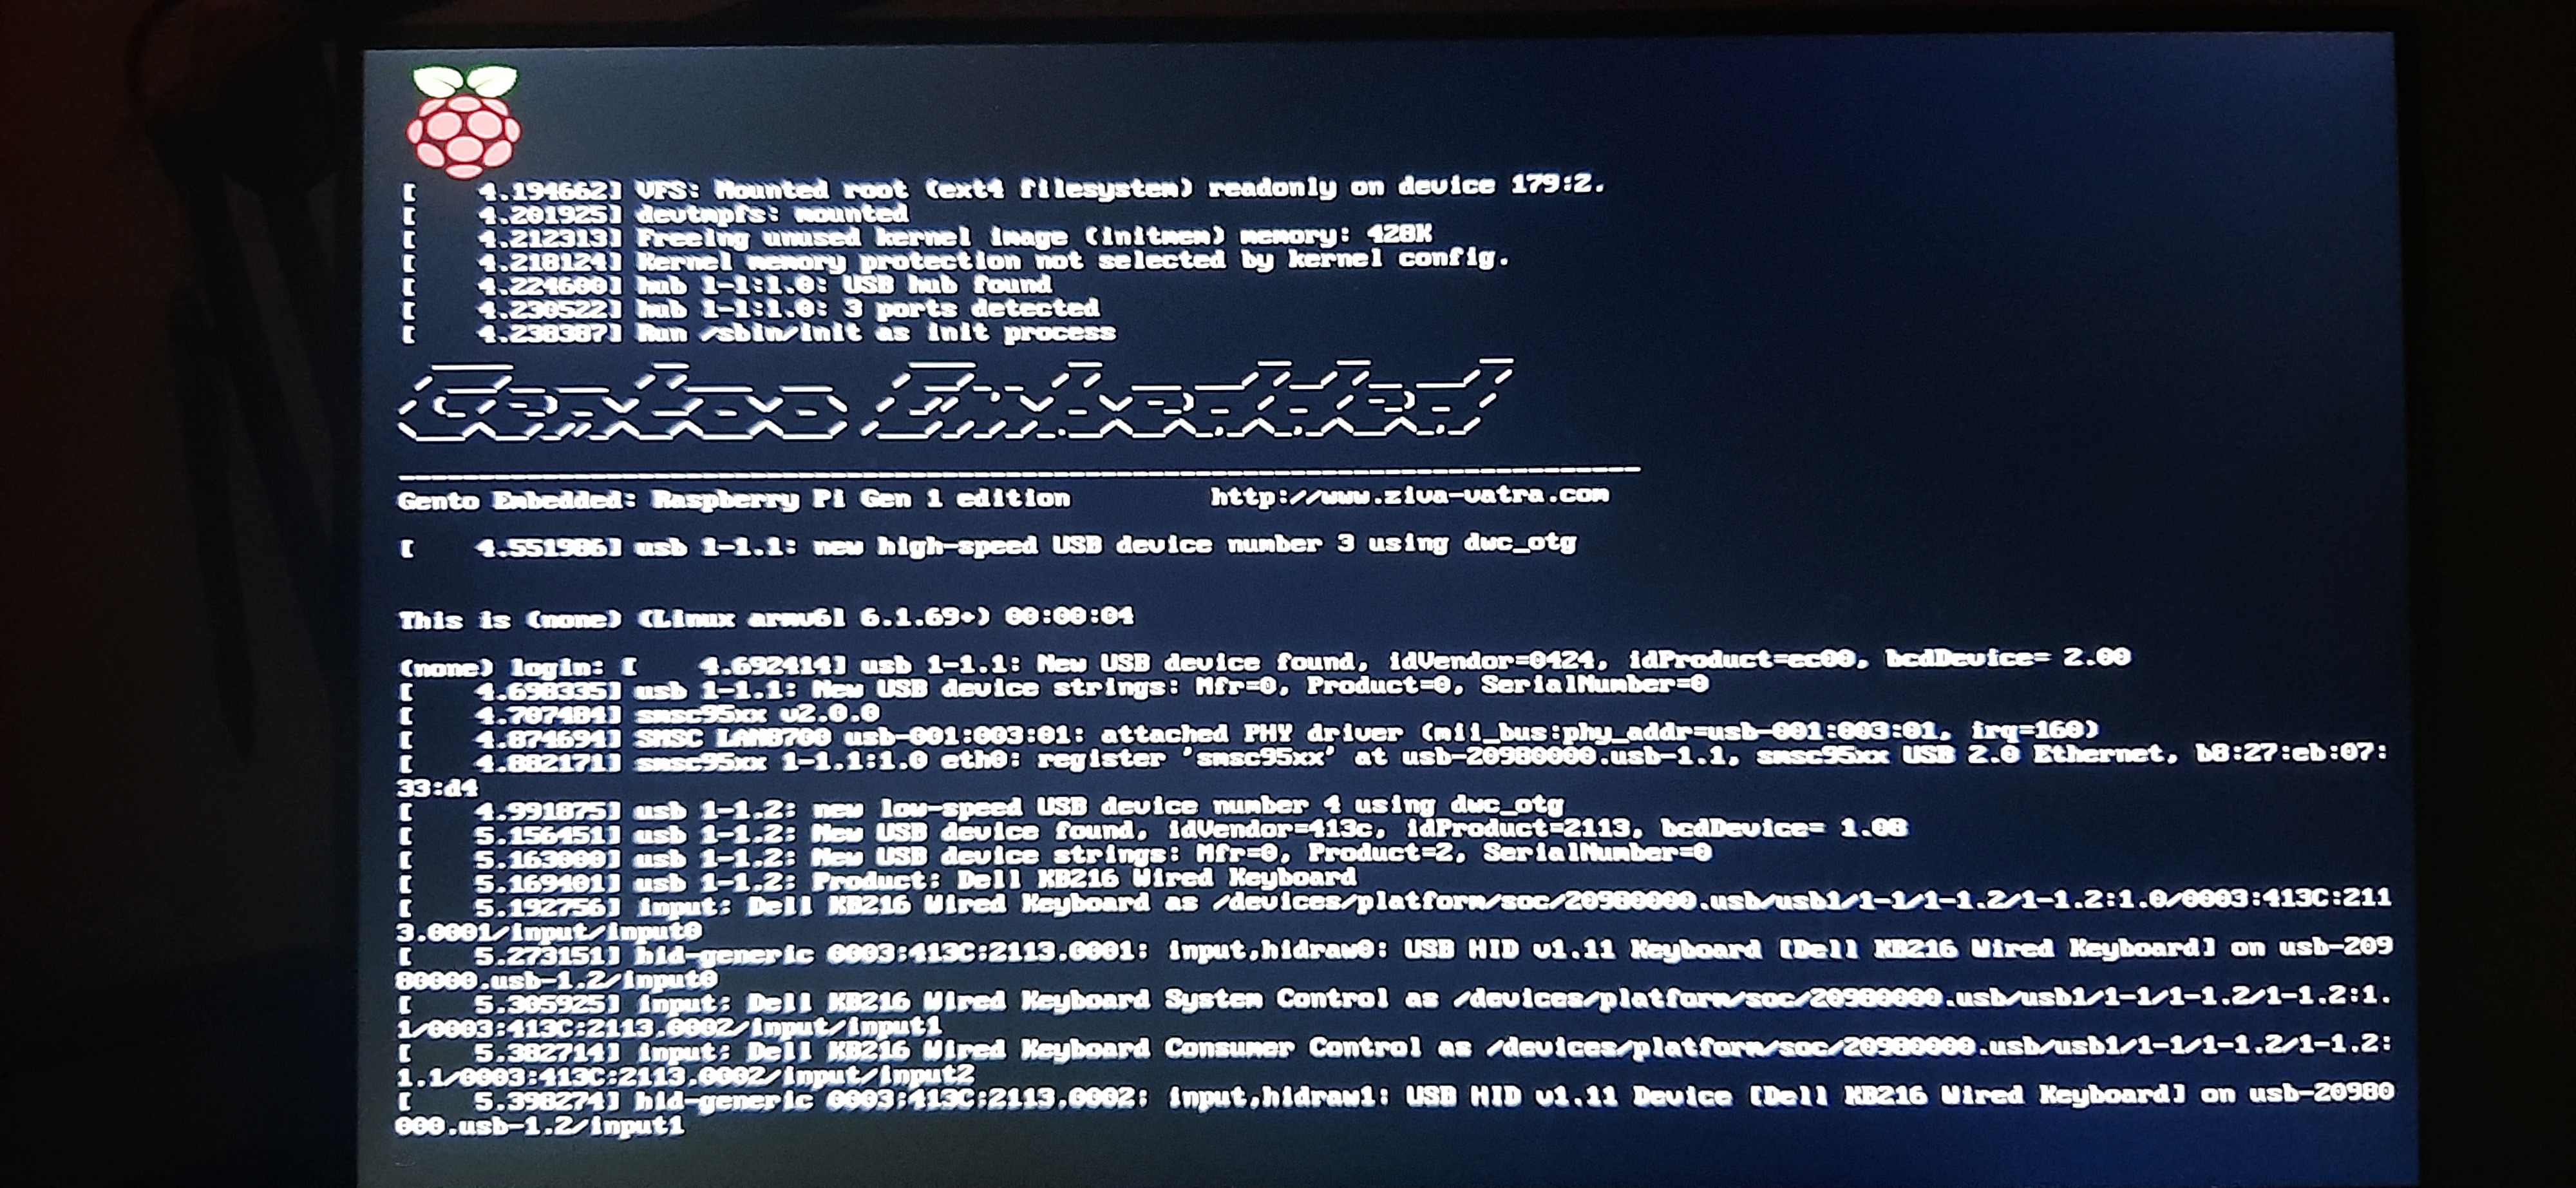
And once you log in you should see the motd, like so (partially obscured here as I plugged the USB keyboard in so we got a bunch of kernel messages:
And that is it! A fully working embedded system for the pi has been built! :-)
Conclusion and Stats:
Current stats for the system are as follows:
- Image size: 64MB
- Boot time: approx 2 seconds
- Memory usage at boot: 16.804MB
Considering the "lite" console only version of Raspbian weighs in at ~500MB and takes 10-20 seconds to boot on the raspberry pi 1, I think our Gentoo Embedded system is a great improvement. Our bare system only needs ~17MB of RAM to run, leaving the rest free. In the case of our 256MB pi, that is a big difference.
Likewise the entire OS is only 64MB of space. Admittedly this is very bloated compared to the old embedded Linux (when you could fit everything on a 1.44MB floppy disk) but considering you can't even fit the Linux kernel on a floppy anymore, and the smallest micro SD card I can find to buy is 32GB nowadays, I think the image size is not only fine, but a bit on the small side. No doubt if we install third party software on it, it will grow further.
One thing it highlighted for me is that the mainline libc is not that large compared to the kind of space we can get nowadays. As such, unless you really need to get your Linux OS under 64MB of space, you don't need to go with alternative libc's like musl.
Building an embedded system for the pi was more complex then doing it for x86 systems, however it was made much easier by the development of the crossdev system, and the fact the Raspberry Pi foundation gave good documentation on the boot process and all the firmwares and other quirks that can catch you out on other SBC's, so thanks to them both for their efforts.
With that, I am happy to mark the main part of this article completed. Any future addendum's will deal with my real-world usage of the system.
Addendum:
December 2023: Set up for Serial console
As luck would have it, my Raspberry pi gave up the ghost partially during development of this article. Not sure why, but after repeated power cycling while debugging images, they Ethernet and USB stopped working. They receive power, but were otherwise dead.
After a days debugging and researching on the internet, I discovered that re-soldering the X1 crystal bought it back to life. Unfortunately this only lasted a day or two, and then it died again, after which no matter how many times I re-soldered it would not come back online. I guess it would have happened sooner or later being a pre-production pi, before proper QA testing had come into being. Plus they would still have been debugging the actual assembly and PCB design, and the pi itself is by virtue of that one of the oldest Gen 1 pi's out there. Still, the rest of the pi works fine including the GPIO ports though.
As this is my only leftover Gen1 pi, I decided to use it as an example of a configured serial console version of my Gentoo Embedded system. Hopefully this will allow me to interact with the console again.
First thing I had to do is hook up a USB <-> TTL converter to the STTY GPIO ports on the pi:

Interestingly my converter provides a 5V line, and it is enough to power the entire pi (this may be because half of it no longer works though!), so I did not need to hook any other cables up to it as shown.
Once hooked up, I had to make the following modifications to my image:
- Changes to cmdline.txt to send the console to the stty at 115200 baud (we changed "console=tty1" below):
root=/dev/mmcblk0p2 rootfstype=ext4 init=/sbin/init console=ttyAMA0,115200 rootwait"
- Changes to /etc/inittab to spawn a getty on the serial console:
::respawn:/sbin/getty -L ttyAMA0 115200 vt102 #Uncomment this line
This tells the pi to open the serial port for a baud rate of 115200, dump all the kernel messages to it, and finally spawn a login shell so we can interact
Serial Access - screen
I discovered that the screen terminal multiplexer I have been using for decades actually supports direct access to serial consoles. Proof that you can use a tool for years and still not know all the features it has. As this is much simpler than using minicom I've deprecated that option below.
First make sure you don't have brltty running (remove if you do). If you already have screen installed, then using it is rather simple, just run:
~: apt remove brltty
~: screen /dev/ttyUSB0,9600  # Replace with what serial port and baud rate you want
And that is it, screen automatically opens a window with a plain serial console, plus you have all the other screen features (like multiple windows, split windows, buffers, etc...)
Serial Access - Minicom (Deprecated)
With the discovery that "screen" can access serial terminals, we no longer need to install the full-fat minicom system (which is more designed for modems) to use as a serial terminal. It is left here for historical reference.
To use minicom, you have to install it onto your system. On Devuan I also had to remove the "brltty" package as it was interfering with the serial port:
apt remove brltty
apt install minicom
I then had to make some configuration changes to minicom, specifically to disable hardware rts and cts, as while my FTDI adaptor supports it, the pi doesn't. I also enabled line wrapping and set the hangup string to "" (because minicom also works with modems, so you can set specific commands at start and end). My configuration file is in "/etc/minicom/minirc.ttyUSB" and is configured thusly:
# Machine-generated file - use "minicom -s" to change parameters.
pu port             /dev/ttyUSB0
pu baudrate         115200
pu bits             8
pu parity           N
pu stopbits         1
pu mhangup
pu rtscts           No
pu linewrap         Yes
Once the configuration file is in place, you can run minicom with the configuration file suffix to load the config:
minicom ttyUSB
Likewise to change the settings to suit you, run "minicom -s ttyUSB" then when you are done select "Save setup as ttyUSB" on your minicom menu
Once done, when you boot your pi and run minicom, you should get the console with login prompt as shown:
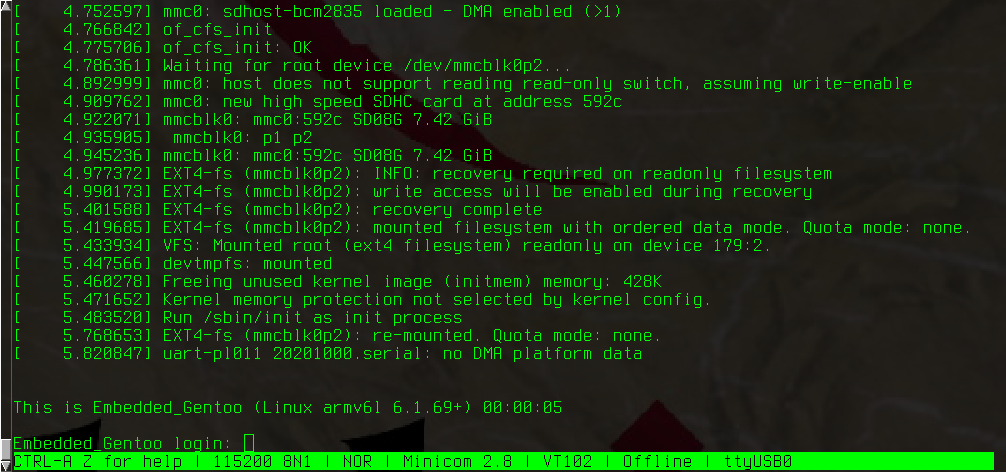
And once we log in, we get our motd to welcome us:
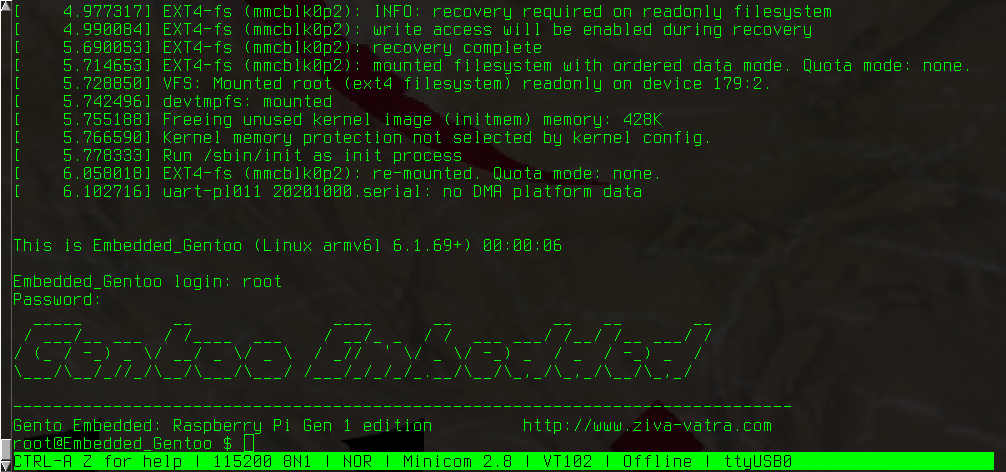
So there we are, now we have a working serial console! I can carry on using the pi as a demonstration of the embedded system at least. Interestingly the console shows that USB is still detected:
[    3.452074] dwc_otg 20980000.usb: DWC OTG Controller
[    3.454804] dwc_otg 20980000.usb: new USB bus registered, assigned bus number 1
[    3.459816] dwc_otg 20980000.usb: irq 56, io mem 0x00000000
[    3.462464] Init: Port Power? op_state=1
[    3.465027] Init: Power Port (0)
[    3.467865] usb usb1: New USB device found, idVendor=1d6b, idProduct=0002, bcdDevice= 6.01
[    3.472940] usb usb1: New USB device strings: Mfr=3, Product=2, SerialNumber=1
[    3.477945] usb usb1: Product: DWC OTG Controller
[    3.480454] usb usb1: Manufacturer: Linux 6.1.69+ dwc_otg_hcd
[    3.483055] usb usb1: SerialNumber: 20980000.usb
[    3.486829] hub 1-0:1.0: USB hub found
[    3.489565] hub 1-0:1.0: 1 port detected
From what I remember reading of the pi's internal electronic architecture, the Broadcom SoC's USB controller is wired to an internal USB hub from where the ports go to the two USB sockets and the other to a USB<->Ethernet for the RJ45. Apparently the SoC is fine, as is its USB controller. It detects only one port, which seems incorrect. That makes me think that whatever has failed is specific to the USB hub rather than the SoC itself.
December 2023: Installing packages
Well, we have our embedded OS running on the pi, but at the moment it can't do much except run itself. We need to install some software to make the pi useful. One of the main reasons we used Gentoo to build our embedded system is for the power of emerge when it comes to dependency resolution and cross compiling.
For this example I had to think a bit, because most of the things I would use the pi for require either USB, Network access, or both. In the end we are going to emerge the pigpio library, which is a GPIO library for the Raspberry pi.
Note that we will use a different ROOT for the build, we are building to "/tmp/pi_rootfs_pkgbuild". This is because "/tmp/pi_roofs" is a pristine copy of a plain install, the base from which we can build all the other images. We don't want to fill it with software for custom applications. It is sufficient to copy the /pi_roofs to the new path before emerging, as so:
cp -R /tmp/pi_rootfs /tmp/pi_rootfs_pkgbuild
ROOT=/tmp/pi_rootfs_pkgbuild/ armv6j-hardfloat-linux-gnueabi-emerge -av dev-libs/pigpio
Unfortunately I've come across one limitation in Gentoo. When you emerge certain packages (like pigpio), it pulls in portage, which pulls in Python, so you end up with a large OS image file even for small libraries. So once again we have to delete files to bring the size down. I delete the following by default (unless I specifically want those packages):
rm -rf /tmp/pi_rootfs_packages/usr/lib/python*
rm -rf /tmp/pi_rootfs_packages/usr/include
rm -rf /tmp/pi_rootfs_packages/var/lib/portage
rm -rf /tmp/pi_rootfs_packages/usr/portage
rm -rf /tmp/pi_rootfs_packages/var/db/pkg
This is wasteful, as you end up compiling portage and Python, only to delete them straight away. I have yet to find a way of emerging packages without pulling in these dependencies. If anyone has got any ideas let me know!
When you are done emerging software into your root, then the data is written to the sd card in the same way as defined in the original article above.
References
Additional references that were not linked to in the article above are placed here.
https://lynxbee.com/solved-brltty-usb-com-port-gets-immediately-disconnected/
https://elinux.org/RPi_cmdline.txt
https://elinux.org/RPiconfig#Device_Tree
https://bloggerbust.ca/post/how-to-configure-minicom-to-connect-over-usb-serial-uart/
https://www.kernel.org/doc/html/latest/admin-guide/kernel-parameters.html


